Using Mercurial: Pulling and Merging
Incorporating changes from the central repository
Once your local version is satisfactory, you will want to combine it with
the work performed by the other members of your team. To retrieve the
current contents of the central respository, use hg pull.
This command creates a new "head" in your repository; it does not combine
the code with yours.
To combine the code, use hg merge right after
hg pull. If all files can be merged automatically,
Mercurial will do so. If Mercurial cannot handle the merge, you will
have to perform the merge manually. On our machines,
gvimdiff is employed for this purpose.
Once the merge process is complete, use hg commit to finalize
the merge.
As it can be annoying to type all three of these commands together, there
is an option to combine them into a single command: hg fetch.
To enable fetching, add the following code to your .hg/hgrc file:
[extensions]
fetch =
That's right; there's nothing after the assignment symbol. It's in the
standard distribution, but not enabled by default.
Using gvimdiff
The gvimdiff program uses the diff mode of the
vim editor to resolve merge conflicts. You do not need to
be fluent in using vim to use gvimdiff effectively;
all the necessary commands will be presented below.
When gvimdiff starts up, you will be presented a window with
three panels: your version of the file, the repository's version of the
file, and an attempted merge of the two files. Your job is to resolve all
ambiguities in the merged version.
As a working example, I will show how to merge two short text files:
demo1.txt and demo2.txt.
A very common scenario in a merge is to prefer one version over the other.
In this case, we just want to copy the preferred file into the merged file.
Click on the desired version, then type :diffput 3 (and Enter).
This copies everything over, as you can see below:

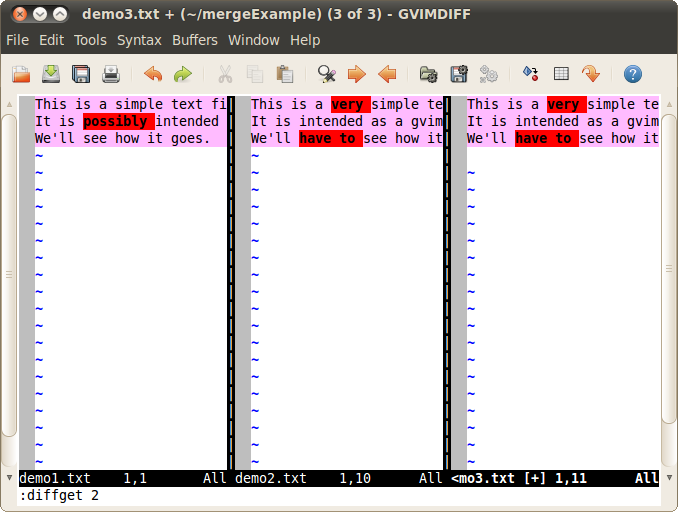
In some cases, we want to copy certain lines from one of the files into
our merged file. In this case, click on the merged file's panel. Then type
:[line-number]diffget [buffer-number]. In the example below,
typing :3diffget 2 copies line 3 from buffer 2 into the merged
buffer.

The diffget command differs from diffput only
regarding the "perspective" from which changes happen. If your cursor is
in the originating window, use diffput; if your
cursor is in the destination window, use diffget.
In this example, diffget is employed to copy the entirety of
buffer 2 into the merged buffer:
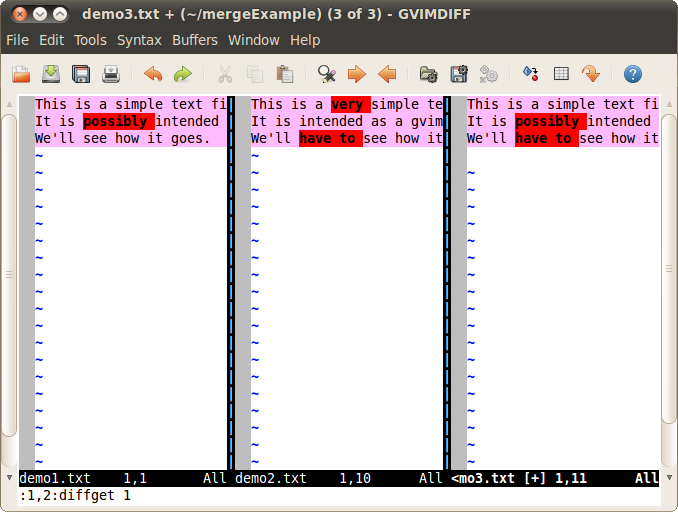
Rather than copying one line at a time, a range of lines can also be copied.
The syntax for this is :[line1,line2]:diffget [buffer-number].
In this example, the first two lines from buffer 1 are copied into buffer 3
using the command :1,2:diffget 1:
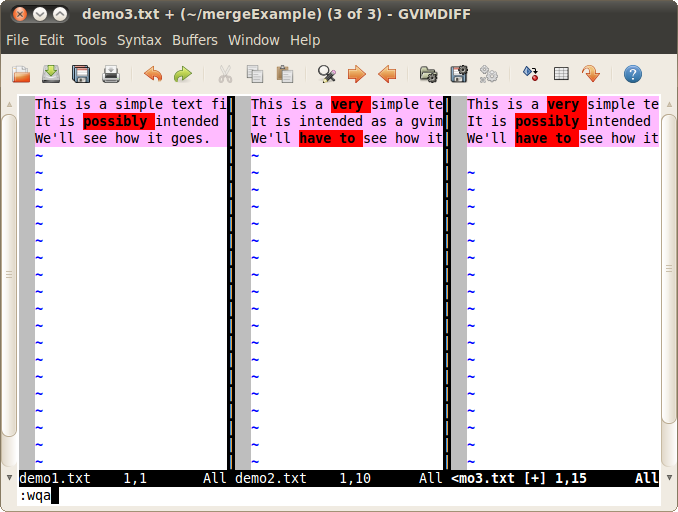
Once the merged version is satisfactory, use :wqa to save
everything and exit:
Of course, once your merge is complete it is essential to sanity-check
your work. In particular, you should compile the code and run the unit
tests to make sure everything is in order.